
DECEMBER 24, 2013: THIS PATTERN HAS BEEN UPDATED FROM THE ORIGINAL VERSION POSTED IN 2009. THE HEEL AND TOES PROCESSES HAVE BEEN ALTERED TO BE EASIER TO WORK.
These are a quick pair of socks to make, owing to the fact that the yarn is much bigger than normal. Ordinarily I believe that fingering weight and lace weight yarns are the best for crocheting socks, but this is the exception to that rule. Keep the yarn soft and loose – a tightly spun bulky weight yarn will feel awful on the soles of even the toughest feet. Lofty soft spun yarn is ideal.
I can make a pair of these while watching a movie because the large gauge means that they work up quickly. These would make a great last minute gift for someone with a cold floor!! Since yarn can be slippery sometimes, putting dots on the bottom with textured puffy glue (from Michael’s or another crafting store) can help to increase the grip on the floor. Unless you like sliding from room to room.
Gauge: about 3.25 sts/inch in sc blo.
Hook: 5.0mm
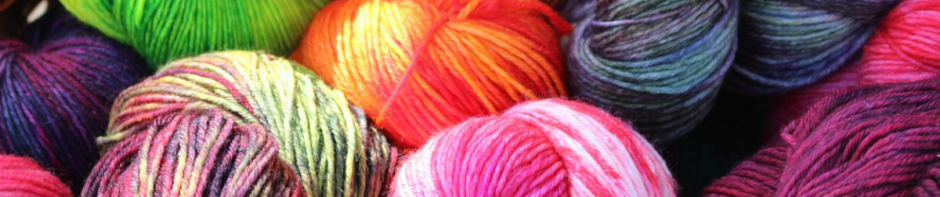
Yarn: Bernat Roving, two skeins.
I used to recommend Sean’s Sheep “Armytage” because that is what I had made the first few pairs with, when I first posted this patter in 2009. That yarn has since been either discontinued or ninjas have hidden it. Bernat Roving is a good substitute. Look for a #5 weight yarn that is soft and lofty, and not tightly spun. This would be a great project for a nice hand-painted bulky yarn.
Chain 7, flip the foundation chain over, and starting with the second chain from the hook, work 6 sc across. Pivot the chain and work 6 single crochet into the top loops, for a total of 12 sc. Place split ring markers into the side edge stitches of your work.
First increase round:
Work 2 sc before and after each marked stitch.
Second increase round:
Repeat as before.
Third round:
Work even.
Repeat rounds two and three until the sock, when flattened width-wise, measures just shy of half the measurement around the ball of your foot.
Example: if the ball of your foot measures 9″ around, the toe cap should measure 4.25 to 4.5″ across.
When you are ready to work in even rounds, keep one marker to show the beginning of your round, moving it upwards as the work progresses, drop the other marker, and work even in a spiral (not turning or joining), working your single crochet through the back loop only (sc blo). Work in rounds until the sock, from the beginning, measures 2″ less than the total length of your foot.
Working the heel:
Flatten the sock width-wise and mark the side edge. Work in pattern (sc blo) over to this marked stitch. This marked stitch is the beginning of your heel. Work this stitch and all other heel stitches as normal sc, in both loops of the stitch.
Example: if your sock is 28 sts around, you will work the very first row of the heel on 14 sts. The rest of the heel instructions proceed as though you are working on 14 sts – but you substitute your numbers if they are different and proceed in exactly the same fashion:
First row (RS): sc in 14 sts, ch 1, turn.
Second row (WS): sc across, leaving last stitch unworked. Ch1 turn. 13 sc
Third row (RS): sc across, leaving the last stitch unworked. Ch 1 turn. 12 sc
Continue as established, leaving one stitch unworked until you have 6 sc.
Next row: ch 1, turn, sc 6 sts, sc2tog over side edge and skipped st in row below. Ss in next side edge. Turn. 7 sc
Next row: skip ss, sc in 7 sc across to end of row, work sc2tog over side edge and skipped st in row below. Ss in next side edge. Turn. 8 sc
By picking up stitches in this manner, you create a short row heel that is shaped like a cup.
When you have picked up 14 sc in this manner (or whatever your number was), continue working in rounds of sc blo to work the leg of the sock. Make the leg as short or as long as you wish. In this example, we work 5 rounds.
Leg:
Work 5 rnds in sc blo.
Round 6: work 4 decreases (sc2tog) evenly on this round. 24 sc.
Round 7&8: work even, sc blo, on 24 sts.
Round 9: Work hdc in both top loops of each sc around.
Round 10: Work front post dc around each hdc. Join first st to last with a ss and turn.
Round 11: Work back post dc around each fpdc. Join beg to end with ss and turn.
Round 12: Work fpdc around each bpdc. Join with beg to end with ss, fasten off.
Weave in ends and enjoy your socks.

Oh those are just Lovely! Do you know of anyway to get that yarn in the US, or of any good US substitutions? I love the look of this yarn and I bet if feels even better
It feels GREAT!!! I get this yarn from WalMart in Canada, so try there first.
How clever. I didn’t know you could crochet socks. mind you I didn’t think about it either! 😉
Thanks so much for sharing your patterns.You have some great socks. This is my first try at one of your patterns and I have understood everything up until the heel bit. I am new to crochet and would much appreciate it if you could help me out a bit. sorry I just need to keep things really simple. so at the shaping the heel section you say to :
Next row: sc in 14 sts, ch 1, turn. 13 sc.
Next row: sc in 13 sts, ch 1, turn, leaving one stitch unworked. 12 sc.
Next row: sc in 12 sts, ch 1, turn, leaving one stitch unworked. 11 sc.
I really don’t understand this bit. For example does the first instruction mean that after you single chain into 14 stitches, chain 1 then turn, you should have 13 single crochets. Because after doing 14 sc don’t you have 14 sc not 13sc. I am so lost here and have put my socks away for now till I can work this bit out. Also because my socks are 24 stitches not 28 I do 12 sc on the first bit and then do I minus 1 on each next one?
Sorry that I can’t work this out. I really would appreciate your advise
I love this sock, too. I, too, am confused on the heel part? When going back and forth to get to 7 crochet, well I get lost after that. What happens to the other 14 stitches that were not crocheted in on the other side of the sock? Any guidance will be greatly appreciated.
Once you pick up your sts again, as you work back down the sides of the heel flap that you created, just start working in the round on all the sts. Like knitted socks, you can have little odd spaces between the front and rear sts, so you may have to work a sc2tog or sc3tog between the two halves of your sock, on both sides, to close any little gap that might be there.
Hope that helps!!!
Thank you for the new advice but I am still crocheting and ripping, crocheting and ripping?? I don’t knit and am a very visual person. I have searched the web for some diagrams of short row heels but all I get is knitted. I am a fairly experienced crocheter but this is my first pair of socks and I am just NOT getting this heel:) I think I am good up to the crochet 7 across. You come out with something that looks like a double sided staircase. I get lost once I start trying to add sc back in. It seems there is a lot of space when doing the sc2tog??? I am probably not explaining what I don’t understand very well? Do you know of any diagrams on the web which show a crocheted short row heel? Thank you so much. I do love the sock and think it is going to fit beautifully if I can just figure out how to finish it, hehe.
What does skip ss mean?
Thanks so much for this pattern! I just finished a pair for my mom for Christmas =) I’ll have to tell her that these aren’t just socks though… they’re so warm, they’re literally little sweaters for your feet!
It’s a wonderful pattern – I know I’ll be making more for myself soon =D
Thanks for the pattern. I think I should try my first pair of socks (which I mistakenly thought would be easy) as a prototype and make my boyfriend’s socks after I’ve had some practice.
Which of your patterns do you think I should practice with? He really wants a nice bulky sock like this pattern.
cyndi
aka anitalite ;-)_
skip ss means, skip slip stitches.
the fastest pair of socks i’ve made! thank you much
Any comparable wool – I have not seen this here anywhere?? What is the weight of this so I can find some in Canada. THANKS.
what does pivot mean
It looks like a pattern I can do. But must change to a non-wool yarn first. It’s so hard to find sock yarn that isn’t wool. Thank you so much!
I’ll be starting these tonight! I’ve had cold feet for the last 31 years so needless to say my hubbo thanks you…
Anonymous said…
what does pivot mean
December 13, 2011 9:56 AM
Ditto……What does pivot mean? First time I’ve heard of a pivot stitch….or is it NOT a stitch? Anxious to get going on this great pattern! Maria halfhaas@sti.net
Hi I am in Australia and find a lot of these patterns are very difficult. I too am lost with the heel, but I knitted a pair first and think I will be able to figure it out. Try googling the words you don’t understand, that’s how I managed.
Do you happen to have any video tutorials. i am not good at following written instructions…much better for me if i can see how it’s done. Thx!
Pivot, usaully means turn. 🙂
Chain 7, flip the foundation chain over, and starting with the second chain from the hook, work 6 slip stitches across. Pivot the chain and work 6 single crochet into the top loops. Errata: Pivot the work again and make 6 sc into the 6 ss you worked previously, for a total of 12 sc. Place split ring markers into the side edge stitches of your work
I cannot make sense of this. Are you supposed to wind up with 2 rounds of 6 or 1 round of 12. It looks to me like it will be 2 rounds of 6.
DOES ANYONE HAVE AN EASIER DIRECTIONS FOR CROCHETED SOCKS IS THERE ANY SITE THAT SHOWS HOW TO DO THIS SOCK PATTERN
There are lots of people making socks on youtube, if you search. I don’t film videos because my netbook has pretty much been on life support for almost two years, but I just can’t afford to replace it. I’ve considered putting out patterns that are 90% visual and 10% written down because I sympathize totally with people who come from other English speaking countries that can’t always get what is written because I look at other peoples’ patterns and scratch my head, too….but any visual patterns won’t be free. There’s enough free stuff floating around already online.
I just finished the first sock….very pleased! My advice is just start and go with it. I had never made socks before so when I just started reading the pattern, it seemed very confusing… But once I picked up my hook and yarn and followed step by step, it all came together nicely!
You can go to favecrafts.com and find a lot of crochet socks.
Nicole, Thank you so much for your generosity in providing this lovely sock pattern. I can tell you put a lot of time and effort in writing this. My very first pair of socks and I am well pleased. It went rather fast for me because I’ve been crocheting a long time. To those confused on the heel, it may go easier if where it says, “Chain 1, turn, Leaving one stitch unworked”(which is the very last stitch), that you put a marker in this last unfinished stitch as you work. This serves as a map as to where to place the stitch when you are directed to do so. (You’re only dealing with about five or six markers and after you get used to the pattern, you won’t need them). I don’t know why but markers also made it clearer for me to see where to place the stitches required in the edge. Once I did this, I followed the directions exactly and somehow, magically, the heel came together for me to start working in the round again.
The Drops website has an excellent video tutorial on jpw to do the crochet heel as described here. Just Google drop crochet heel video.
Hello, I was just wondering if anyone can help me to figure out how many stitches I would need in order to make the pattern above for a person that wears a size 11 and a half shoe? If someone can please explain how many I would start with and what not, I would greatly appreciate it.
I would just go up a hook size and check the gauge.
Cute socks. Found them through Hooked on Crochet. Thanks for sharing. After reading through your instructions. I plan to start a pair tonight. <3 Diane
Pingback: Don’t let the Polar Vortex give you unhappy feet — and other body parts | Simple Sock Making